Which I did, and here's how it looks now:
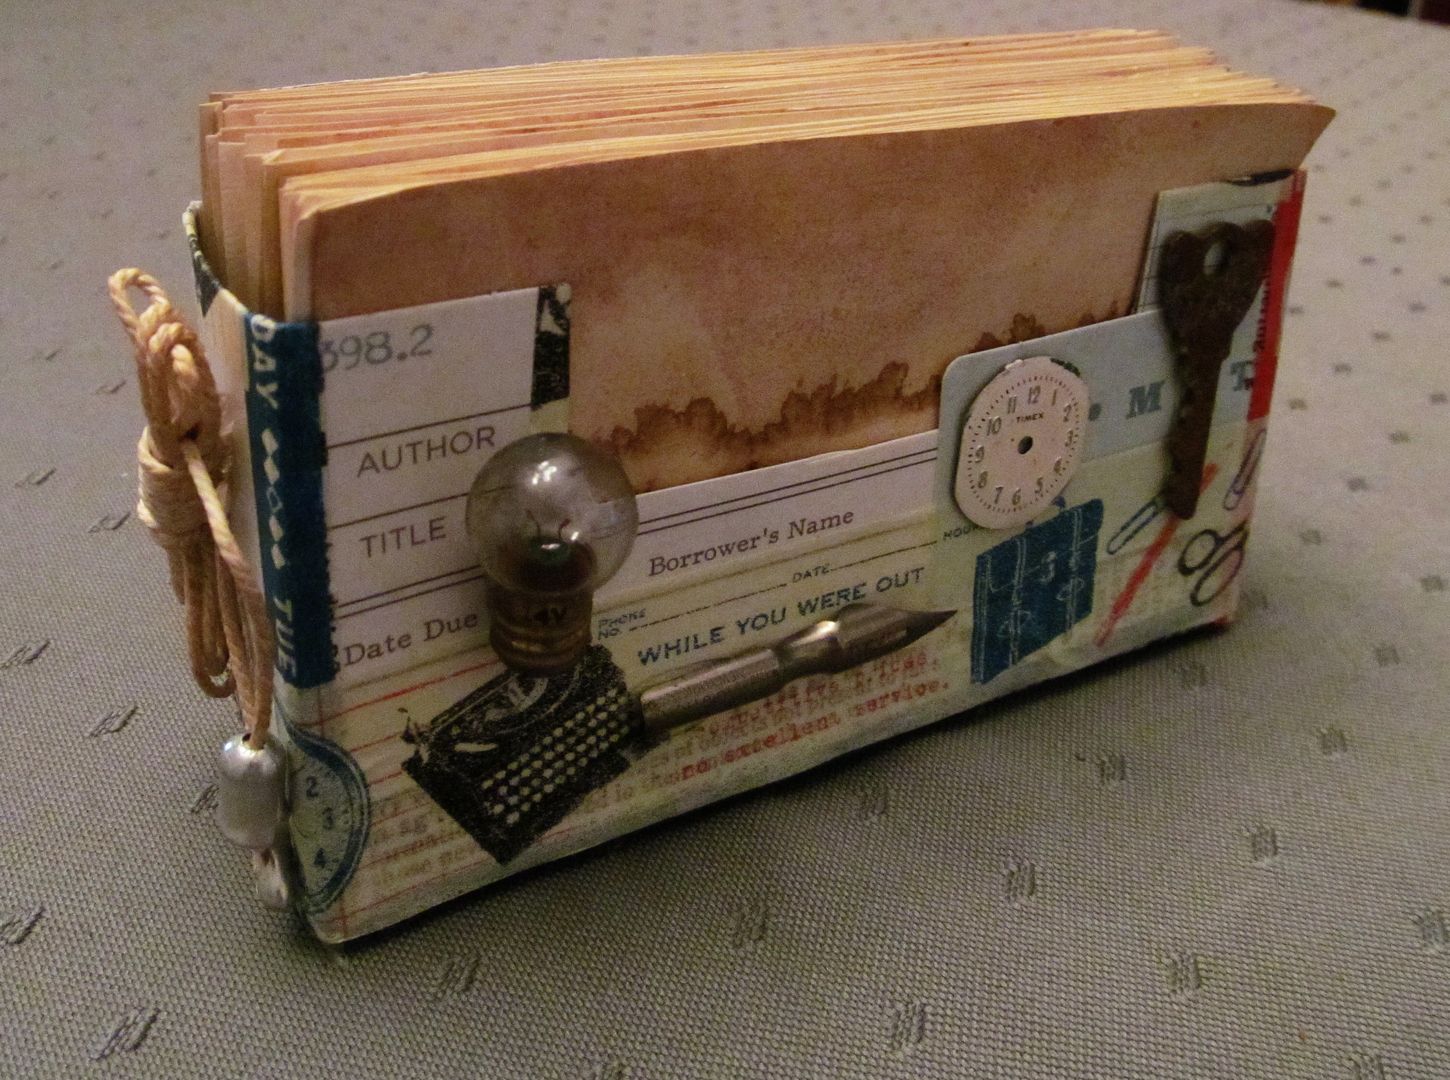
Rather than turn the index cards into a book I decided to keep them in the same physical format and simply enhance their appearance. I also wanted to make this a green project, so I only used what I had on hand to do so. I started with two tea bags and some boiling water; I made a strong batch of tea and immersed the cards in it. Tea staining darkened the blinding white of the index cardstock to various shades of cream and ecru, blurred and lightened the ruled lines on the cards, and created some lovely mottled marks and warping, which all together gave the cards a wonderful antique look.
Tea staining doesn't make the cards tacky, btw, but it does leave a faint odor of tea. If you want to try this method, remember to let the tea cool enough first to work with without scalding your hands or fingers. Also do handle the cards carefully when they're wet as they tend to tear easily. Other options to alter the appearance of index cards would be to apply light washes of watercolor paint or spritzes of diluted food coloring. Those of you who are experienced paper makers are likely familiar with various commercial dyes that would work, too. If you don't mind the white color of the index cards, you might decorate them instead with stickers, cutouts, rub-on transfers or other scrapbooking bits.
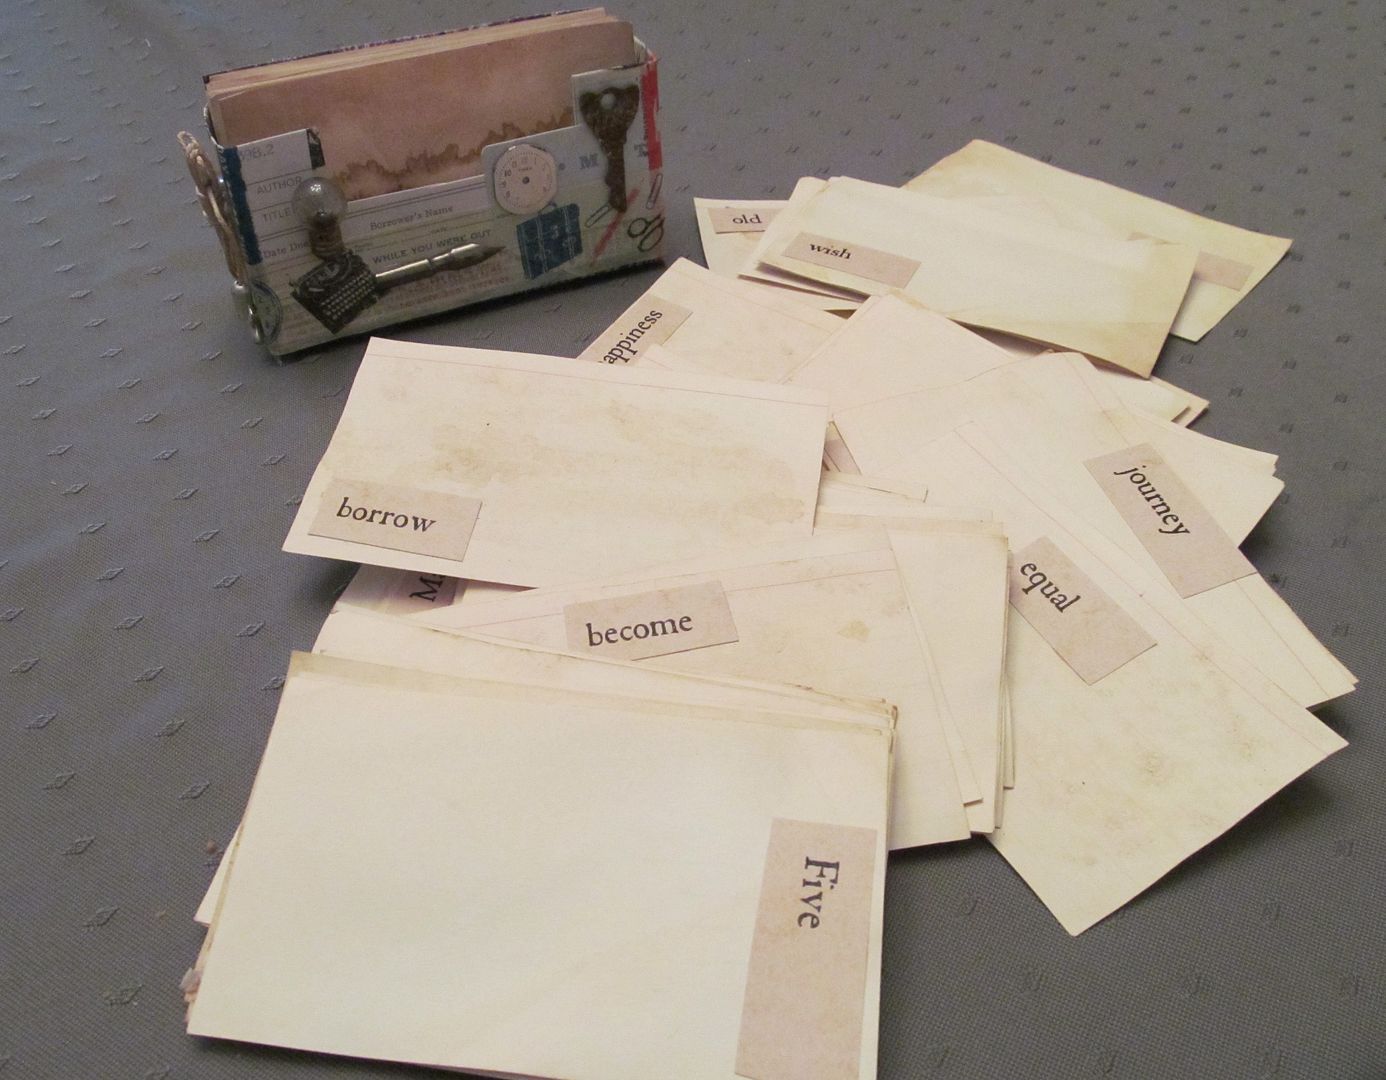
Once my stained cards were completely dry I printed out some pages of words (two for every letter of the alphabet, a group of numbers, and the months of the year) in an antique font on cream-colored paper. I cut out and glued one word in a random spot on each index card. These words serve as my writing prompts; whatever I add to the card while journaling should relate somehow to that word. I also left about fifty cards deliberately blank so I can write whatever I like on those.

Once I had the cards finished I unfolded the cardboard holder, covered it with bits of paper and cardstock from my recyclable paper bin, and reassembled it. I added some decorative paper tape to the edges and corner folds to make it a bit more sturdy. The final touch was hot-gluing neat junk like rusty keys, old buttons, string, a little light bulb and an old pen nib to give the base a bit more style and weight. So that I can mark my progress as I use the cards I cut out the picture of a peacock from the top of an empty puzzle box (yes, I even save those to recycle) and made that my journal marker.
I've planned to use my index card journal for writing practice and daily inspiration, but you can always skip the prompts and simply write a journal entry on each card and keep them in date or subject order. Writers might adapt the cards to serve in other ways, like plotting out scenes from your story, creating an index of characters, settings, backstory or whatever you like. Those of you who blog might glue some prompts from a blogging inspiration source and then take a card at random to give you an idea for a new post. Readers, this would be a great way to keep notes on the books you've read, or to simply track titles so you don't accidentally buy second copies; you can create a card for each author, keep them in alphabetical order, and make notes on their books accordingly. Or if you're the plan-ahead sort, you can make up cards for each month of the year and note which new releases you want to read during that month. You can add photos, divider cards, recipes and pretty much anything else you want and can fit in the base to personalize your index card journal, too.

This is so awesome! Such a great idea!x
ReplyDeleteIt was a lot of fun to make, and I really liked the look of the results -- so different from the original.
DeleteThis would be a great Lenten project--creating a card a day. Thanks for the idea--I love it!
ReplyDeleteSandyL
Excellent idea, Sandy, thanks for noting that.
DeleteWhat a brilliant idea. I have to try this.
ReplyDeleteI made mine in two days so it doesn't require a lot of time, either. Just a lot of tea (ha) and proper space to lay out the index cards to dry.
DeleteThese are fabulous! I knew about tea-staining, but had never considered it for paper ... especially not index cards. Great idea!
ReplyDeleteI've tea-dyed fabrics but this was my first attempt at staining paper. I was actually inspired by one of the etsy artisans I buy trims from, Mary at homestead treasures. She wraps her narrow trims around a tea-stained and stamped tag, which gave me the index to try it with these index cards.
DeleteI LOVE this! I especially love that there's a library checkout card on the box. :) Going to have to try making one of these for myself.
ReplyDeleteI've been writing a card a day for about a week now, gypsy, and as it only takes a couple of minutes it's a great daily project to do any time. Also very portable.
DeleteReally impressed with your idea, how original. Might just give it a go!
ReplyDeleteIt's a little messy, Suzi, but otherwise very simple to do.
ReplyDelete