 One little way to go green with your holiday gift-giving this year is to make quilted fabric gift tags that double as coasters, and today I'll show you how. For this project you'll need:
Print Fabric scraps
Muslin scraps (or a fabric light enough to write on)
Narrow ribbon
Fine-point indelible marker
Batting scraps or dryer sheets
Scissors
Wide masking tape
Sewing thread
Embroidery floss
Sewing and tapestry needles
White notepaper
Pins
Iron
Optional: Sewing machine, beads, other embellishments
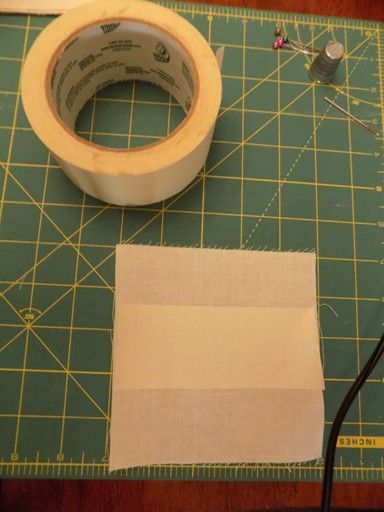
Press all your cloth scraps, and cut the prints and muslin scraps into the size coaster tag you want plus one half inch (so to make a five inch square coaster tag, you'd cut your fabric into 5-1/2" squares.) Cut your batting or a stack of dryer sheets into the exact size of the coaster you want. Place a piece of masking tape across the center on the back of your muslin (like this), turn it over and write the name of your recipient on the front with your marker:

The masking tape is an old quilter's trick to temporarily stabilize the muslin so you can write on it like paper. Once you're finished writing, remove the tape, and stack a square of your print fabric on top of it so the name and the right side of the print are inside:

Place a square of muslin or a stacking of dryer sheets on top of your two squares and pin together:

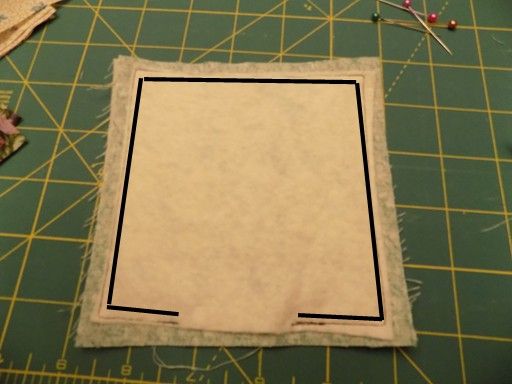
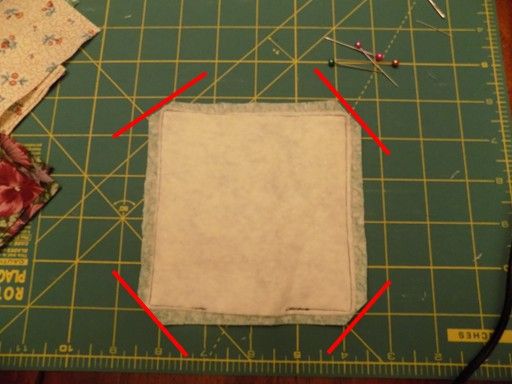
Sew along the edge of the muslin square all the way around (like the black lines in this pic), leaving a 1-1/2" gap at the bottom. Clip your corners (like this), turn inside out, and press flat with your iron:

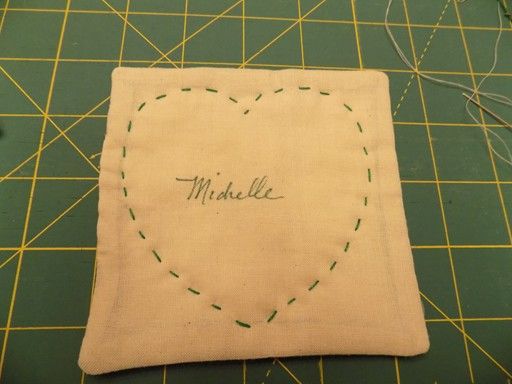
Sew closed the turning gap with a blind stitch, cut a heart shape to fit inside the coaster out of your notepaper, and pin the heart to the coaster:

The heart is your stitching guide. Stitch around it with your embroidery thread.
Thread your piece of narrow ribbon through the corner of your coaster:

Tie it to your gift with the ribbon:

Once they're done with their gift they can use the tag as a little coaster:

You can make these in all kinds of variations:

Some tips: Keep all your beading and raised embellishments on the outside edges of the tag so the center remains flat enough to place a cup on later. You don't have to write names on your tags, you can use an initial (like my K coaster above) or something else that identifies your recipient. One quilter I know makes fabric photo Christmas ornaments like this and uses them as gift tags first.

The Mom one is gorgeous! I really like the fabric and I could see that embellished but no, not with something you'll put hot liquid on. However, another piece of that would look great in a quilt...
ReplyDeleteHow clever! A great idea. :-)
ReplyDeleteNice idea. Unfortunately I've run out of time for this year, but I think I'll put a batch together for next year.
ReplyDeleteSo cute! Not sure I have time to try them, but maybe next year.
ReplyDeleteThese are lovely!
ReplyDelete