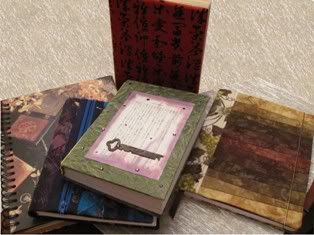
 I've been keeping a daily handwritten journal since 1974, and each year I fill up at least a dozen, sometimes more. I also love to give beautiful blank journals as gifts (and as a nudge to do more non-electronic writing.) I often purchase the journals I use from some very talented journal makers over on Etsy.com, but I also like to make or makeover my own.
My favorite journals to makeover are the ones no one wants; the premade blank books that you see in the scratch-n-dent discount bins at the bookstore. I always feel like I'm rescuing them. The biggest problem with discounted premades is that they generally have dinged, soiled or unsightly covers, but that's easy to fix with a new cover.
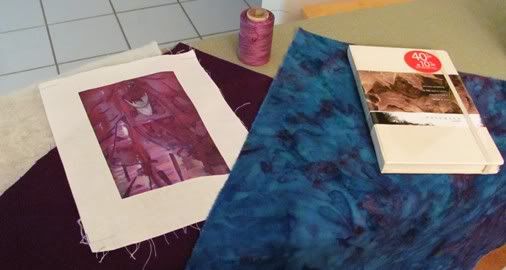
The journal covers I make are simply larger versions of a mug mat that are sized, wrapped around and sewn onto a premade blank book. To make one, you'll need a journal to cover, two pieces of fabric, batting if desired, binding if desired, pins, needle, measuring tape and thread.
Before you begin, you will need to do some measuring and some math. To cover a journal, you want to cut your fabric according to these calculations:
Width of fabric = width of front cover + width of back cover + width of spine + width of 2 inner flaps + 1/2" for seam allowances.
Length of fabric = length of front cover + 1/2" for seam allowances.
The inner flaps can be any width you desire up to the total width of the front or back cover. I don't like wide flaps so I size mine around two or three inches. Also, if you plan to use batting and quilt the piece, I suggest adding 1/8" to 1/4" to the width as well as the length of your fabric to allow for the pull of the loft.
If the journal you're covering is in the pocket-size range and you don't want to mess with binding, you can sew it the same way I made the mug mat, by placing your top and bottom fabrics right sides together and sewing around the edges, leaving a gap for turning.
If your journal is paperback book size or bigger and needs a larger piece to cover it, it's probably best to make your cover like a mini-quilt: with the right sides facing out, sandwich your fabrics together (batting goes in the middle), pin or baste-stitch together, quilt as desired and bind with bias binding.
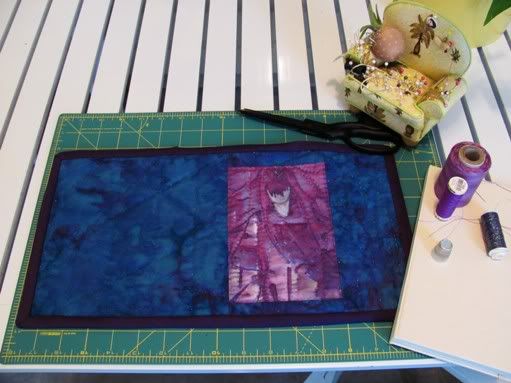
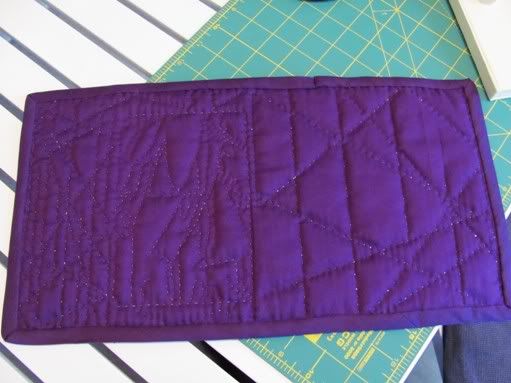
Fabric and thread choices are where you can get really creative and have fun with this project. Because I was working with the vral image test swatch I ordered from Spoonflower, for the outer cover I pieced it with some fabric hand-dyed by an old friend of mine, then quilted the vral patch with matching variegated thread and my friend's fabric with metallic Sulky. For the inside/backing fabric I used a solid color piece to match the binding because it won't be seen.
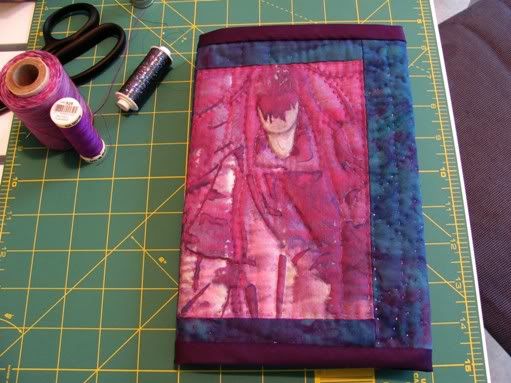
Once you've completed your cover, fit it to the journal and whip or blind-stitch the top and bottom edges of both inner flaps to the edge of the front and back cover edges to hold it in place (you can also use tacky or hot glue but I find that tends to be messy and leaves glue spots showing on the fabric.) Another bonus of sewing the flaps is that it creates an inner pocket where you can stow a pen or bits and pieces or use it as a page tuck.
Journals with handmade covers are great for kids, loved ones, writer friends or any notebook junkie. Personalize the fabric you use for your cover to suit your recipient, then pair it with a pretty pen, a box of photo corners or a CD of music to write by, and you've got a terrific gift for any occasion.

The picture of your mini journals #2 would be a cool blogger background!
ReplyDeleteLove the covers and thanks for sharing ;)
Love this post, really good idea. I love writing all of my poetry into journals as well as random thoughts, they come in handy eventually! :)
ReplyDeletehttp://keepcalmandbookworm.blogspot.com/
The cover is beautiful and of course I want one so guess what I'll be doing this weekend?
ReplyDeleteWhat a great post. Thank you!
ReplyDeleteI love this! Thank you.
ReplyDeleteI bought Making Handmade Books after you mentioned it, but I'm saving it for a treat during Winter Break, incentive to get my classes done.
This is such a great idea. Thank you for sharing :)
ReplyDeleteI've tried keeping a journal for years, but I always get to a point where I stop writing in it, usually for months at a time.
ReplyDeleteYou remind me to get back into it. So much has happened to me since I've written in it last!
The cover is really cool, too. I intentionally buy journals that materials with tactile properties--brocades, etc.--so that I can feel them while writing.
Beautiful covers!
ReplyDelete