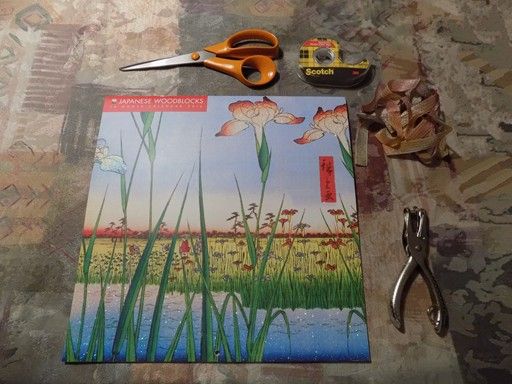
For this project you'll need an old wall calendar, a single hole punch, scissors, double-sided tape, and three 12" to 18" lengths of ribbon, yarn or string. You can also use a paper trimmer if you have one large enough to accommodate your calendar, and staples or glue in place of the double-sided tape:
First, remove the two staples holding your calendar together, and separate it into the six pages plus the cover:
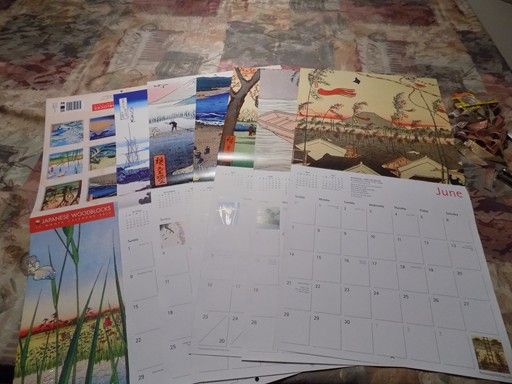
Cut each page in half along the spine line. You will end up with twelve pages and two cover pages:
Place each page picture-side down, and fold up the bottom up to form the pocket for each signature (top page below). To know that you've got a page in the proper position, the little holes in the calendar that you used to hang it on your wall should be at the top of every page, with an upside-down calendar grid facing up (the back cover page will not have that litte hole, however.) The size of the pocket is determined by how much you fold over. Once you've done this, fold the page in half to form a signature (bottom page below):
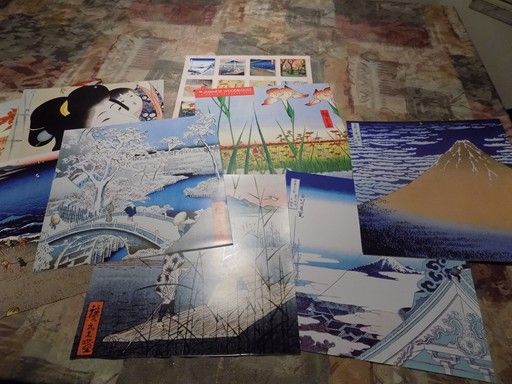
When you're finished folding all your pages and covers, you should have a pile of pocketed signatures like this:

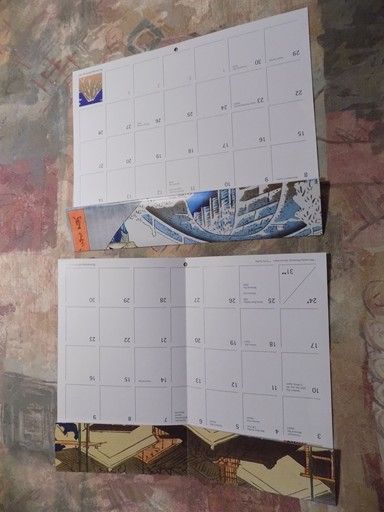
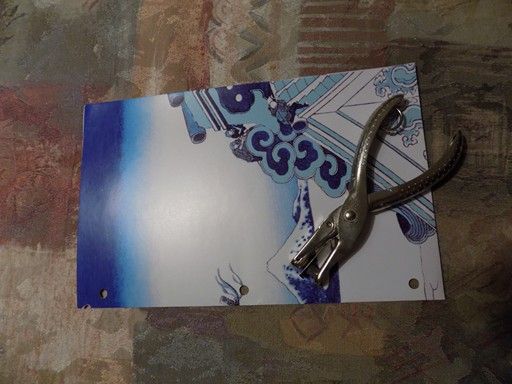
With your single hold punch, make three evenly-spaced holes along the spine fold of each signature:
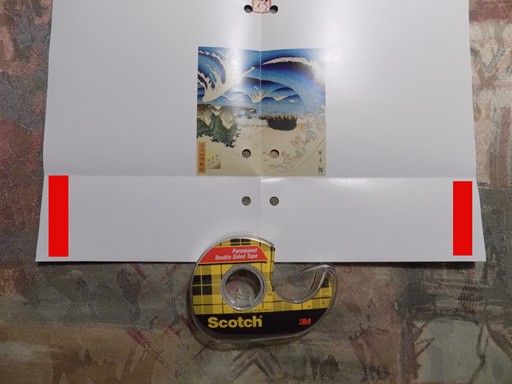
Once you've punched holes in all your signatures, open each one and apply a short piece of double-sided tape to the inside of the pocket fold, where I've indicated below in red, then refold. The tape will seal the sides of each pocket:
Assemble your signatures in a stack, and remember to put them in the order you want them in your keeper. I used the signatures I made from the covers for the first and last pages, as the covers are a bit thicker than the rest of the calendar and make nice covers for the keeper.
Thread your ribbons through each hole in every signature, leaving enough so that you can tie the ends together once it's through all the signatures:
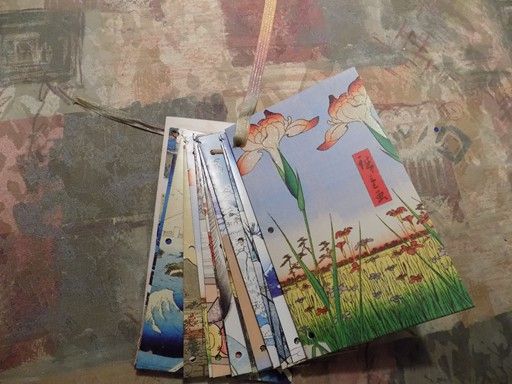
Knot all three of your ribbons (and if you open your keeper to the middle when you place it down before you tie it, this will help prevent you from tying the ribbons too tightly):
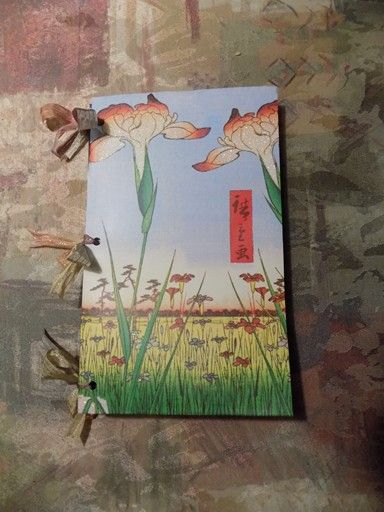
And you end up with a keeper that looks like this:
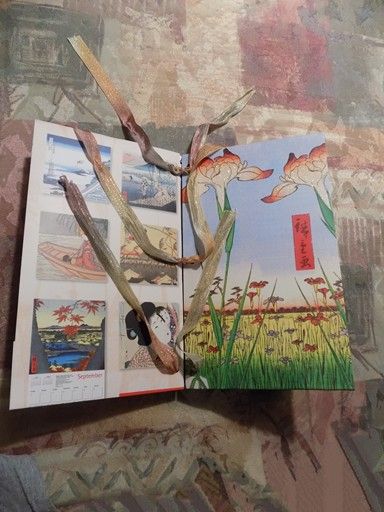
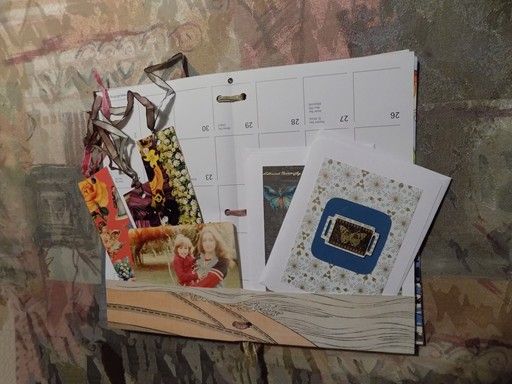
And when you open it, like this between signatures:

What can you keep in your keeper? Anything you want to save that fits in the pocket. A keeper can store your bookmarks, photos, and greeting cards:
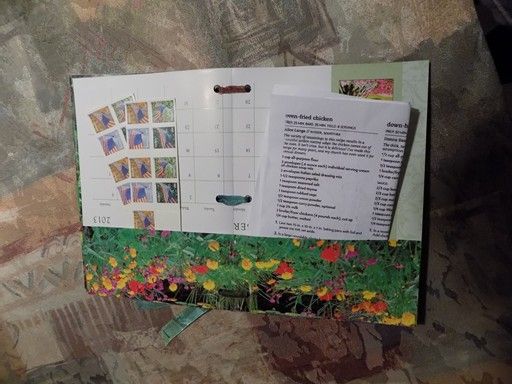
Postage stamps or clipped recipes:
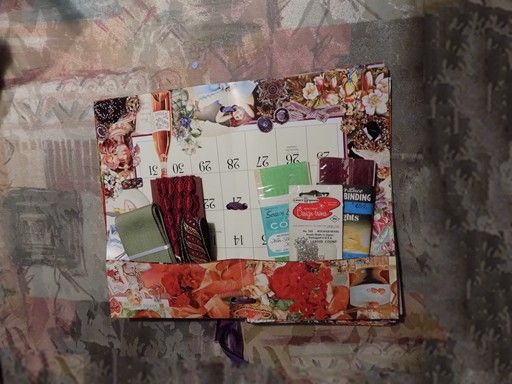
Laces, ribbons and paper, sewing or mixed media ephemera:
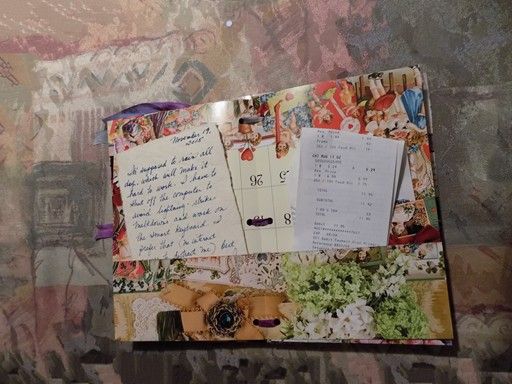
It's a great way to keep notes, journal pages or receipts, too:
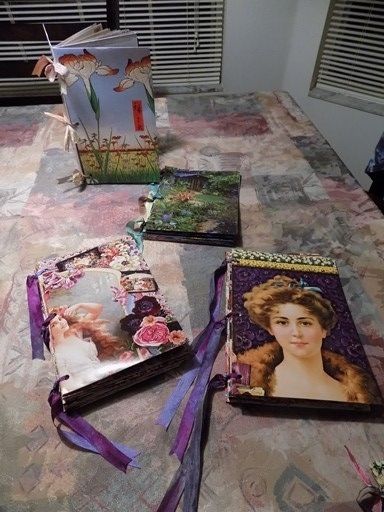
I think the nice thing about this project is that you don't waste any part of the calendar. I made four of these in one day, so it's easy, too:
Some other ideas:
Combine two calendars to make a bigger keeper book.
Instead of using ribbon, try small binder rings.
Punch corresponding holes in pieces of notepaper, and stack them between the signatures to make pages you can write on.
If you're feelings really ambitious, don't punch the holes or use ribbon, and instead coptic-stitch your signatures together.
Label each pocket with a month of the year and use the keeper to store any deductible receipts for tax time.

What a great idea.
ReplyDeleteThis is so cool. I love this!
ReplyDeleteSuch an awesome idea! I have several calendars that I want to keep this way. Thank you!
ReplyDelete